Monitor SNMP ด้วย CloudProxy-vROps

วันนี้เราจะมาสอนวิธีการติดตั้ง Cloud Proxy บน vROps เพื่อไป Monitor Host machine ด้วย Protocol SNMP ( Simple Network Management Protocol )
ก่อนอื่นเรามาทำความเข้าใจ Protocol SNMP กันก่อน
Simple Network Management Protocol (SNMP)
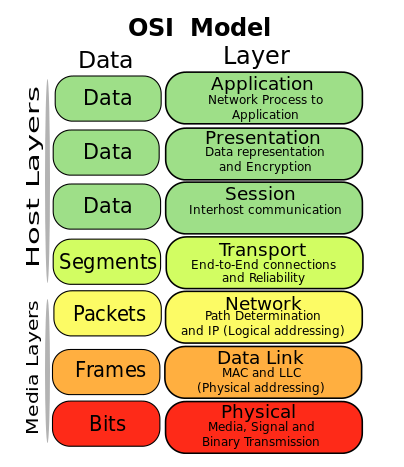
SNMP เป็น Protocol ที่ Layer 7 ( Application Layer ) ในชุด TCP/IP (Transmission Control Protocol/Internet Protocol ) ซึ่ง Protocol SNMP สามารถใช้ในการ Monitor และ Manage network devices จาก IP เราสามารถใช้ Protocol นี้ในการจัดการอุปกรณ์ Router, Switch, Firewall หรือ Server ต่างๆ ที่อยู่ใน Network.

มีการใช้ MIB ( Management Information Base ) ในการเก็บหรือจัดการค่าต่างๆของอุปกรณ์ใน Network โดยจะจัดเก็บอยู่ในรูปแบบ Hierarchical format.
ใน 1 MIB สามารถใช้ในการ Manage ได้หลาย Object โดนเราสามารถระบุ OID (Object Identifier) เพื่อทำการแยก variable ต่างๆใน MIB Hierarchy ได้ ซึ่งเลข OID แต่ละตัวก็จะต่างกันในแต่ละ Vendor / Devices
เช่น OID 1.3.6.1.2.1.25.3.2.1 สามารถใช้ในการ Monitor hrDeviceIndex
1
2
3
4
5
6
7
8
9
10
11
iso (1)
.org (3)
.dod (6)
.internet (1)
.mgmt (2)
.mib-2 (1)
.host (25)
.hrDevice (3)
.hrDeviceTable (2)
.hrDeviceEntry (1)
.hrDeviceIndex (1)
Port ที่ใช้งาน
SNMP ใช้การสื่อสารแบบ UDP ( User Datagram Protocol ) ที่ Port 161/162
Cloud Proxy
ใน vROps เราสามารถใช้ Cloud Proxy ในการเก็บข้อมูลและ Monitor จาก Remote Data Center และส่งข้อมูลกลับไปที่ vRealize Operations. โดยปกติแล้วเราจะใช้ Cloud Proxy เพียง 1 ตัว ต่อ 1 Physical Data Center
Cloud Proxy Installation
-
Login ไปที่ vRealize Operations
-
เลือก Data Sources -> Cloud Proxies กดที่ New

-
เลือก
Download Cloud Proxy OVAและทำการ Save OVA ไว้ที่เครื่อง Local
-
ที่หน้า vSphere Client เลือกที่ Cluster หรือ Folder ของเราที่ต้องการ Deploy Cloud Proxy แล้วกด
Deploy OVF Template
- ตั้งค่า Name, Folder และ Resource Pool
-
ในส่วน Configuration ให้เลือกขนาดของ Cloud Proxy ให้เหมาะกับ Resource หรือจำนวน VM ที่ต้องการ Monitor
Small Cloud Proxy สำหรับ <8000 VMs จะใช้ 2 vCPUs และ Ram 8GB
Standard Cloud Proxy สำหรับระหว่าง 8000–40000 VMs จะใช้ 4 vCPUs และ Ram 32GB
-
ในส่วนของการ Customize Template ทำการ Copy One Time Key จากขั้นตอนที่ 3 จาก vRealize Operations มาใส่

- หลังจากใส่ Name, NTP Server ให้กด Finish เพื่อทำการสร้าง Cloud Proxy vApps
-
ในหน้า vSphere Client ทำการ Power-on VM

หลังจากทำการ Power-on Cloud Proxy VM และ VM ทำการ Initialize สามารถไปดู Cloud Proxy ที่เพิ่งถูกสร้างขึ้นใน vRealize Operations โดยเลือกไปที่ Data Sources -> Cloud Proxies
SNMP Adapter
เราสามารถ Download Management Packs มาใส่ให้ vROps เพื่อเพิ่มความสามารถในการ Monitor, Troubleshooting และ Remediation ของตัว SDDC.

โดยในส่วนของ SNMP Adapter จะใช้ชื่อว่า VMware vRealize Operations Management Pack for SNMP ( ในตัวอย่างเป็น Version 3.2.1 ) สามารถ Download ได้จาก VMware Marketplace
SNMP Adapter Installation
- เข้าไปที่ VMware Marketplace และ Download ไฟล์ PAK Management Pack ของ SNMP
-
เข้าไปที่ Data Sources -> Integrations แล้วกด ADD ใน Tab Repository

-
ทำการ Browse และ Upload ไฟล์ .PAK แล้วทำการ Accept EULA แล้วกด Finish

SNMP Adapter Configuration
- เข้าไปที่ Data Sources -> Integrations แล้วกด Add Account
-
เลือก SNMP Adapter เพื่อสร้าง Adapter

-
ทำการใส่ IP ของ Device ที่ต้องการ Monitor โดยสามารถกำหนดเป็น Range ของ IP ได้

-
ในส่วนของ Credentials สามารถเลือกได้ทั้ง SNMPv2c และ SNMPv3 และใส่ Credentials รวมถึง Protocol ที่ใช้ในการ Authenticate

-
สามารถกด Validate Connection เพื่อทดสอบการเชื่อมต่อกับ Network Device ได้ แล้วกด ADD เพื่อทำการสร้าง Adapter

-
ไปที่ Environment -> Object Browser และเลือก SNMP Adapter เพื่อทำการ Monitor Device ต่างๆ หรือทำการ Create Dashboard ได้

Useful Links:
